

2. Basic content structure
Design your agenda by setting up the speaker profiles and sessions.
● Structure your event using rooms and programm filters
Set up partner company profiles for sponsors and exhibitors
● Set up partner company profiles
3. Involving content contributors
Now you can already involve content contributors like speakers and partners to enter their text content, images, documents and videos. This process is link based and does not require the the contributors to be registered in talque. Please start this early on: our experience shows that contributors need some time to gather all the necessary media:
● Involving speakers in content creation
● Involve partner editors
4. Design your event's features
Design of the features, test them to the optimum solution for your event. Then implement them in detail.
● Matchmaking and onboarding
● Networking (1:1 calls, 1:1 meeting tables, VIP networking tables, speed-dating, unconferencing)
● Video conferencing and streaming
● User interaction (talque session chat, Slido, Mentimeter)
● Custom pages (e.g., for help desk, press release, further reading section)
● Session access (access to sessions and visibility)
5. Inviting participants
Once everything is set up, ready and shiny, open the platform for the participants.
Get the invitation email template ready and send out the invitations – usually 1-2 weeks before the event starts.
The participants will receive an email that asks them to ‘Start onboarding now for … ‘ and the link button will take them straight into talque. Now they are in the talque event platform and can start to discover your event.
The order of the tabs in the admin section will also guide you along this process. Start on the tab General, then add your Branding elements, and so on.
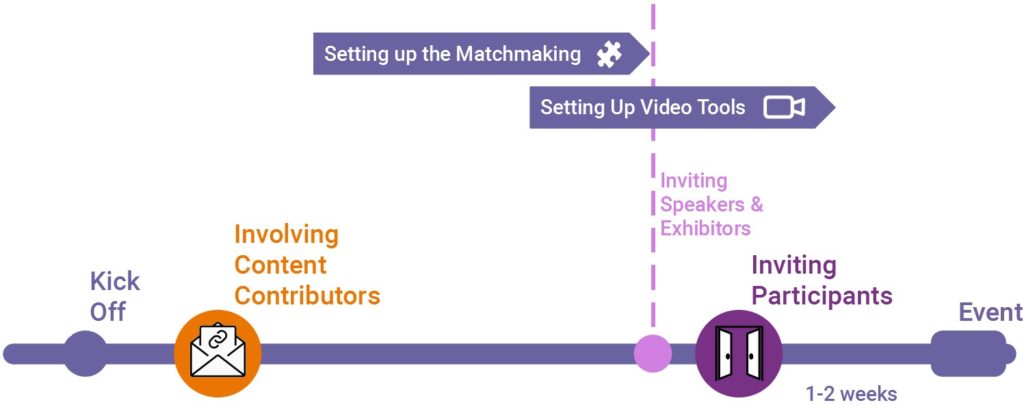
Timeline
Start straight after the kick-off to set up the basic structure of your event like speaker profiles, sessions and partner profiles – with just basic data. Then involve speakers and partner editors to complete their profiles.
About 1-2 weeks before the event starts, invite the participants into the talque app: add them to the invitations tab in the admin area and send out the invitations from there.
Involving content contributors uses a link-based form - editors don't have to register in talque but can start editing straight away. Only when opening the doors to your event later when you send out invitations, participants need to register.
